Canon Pixma TS8222 Inkjet All-In-One printer setup

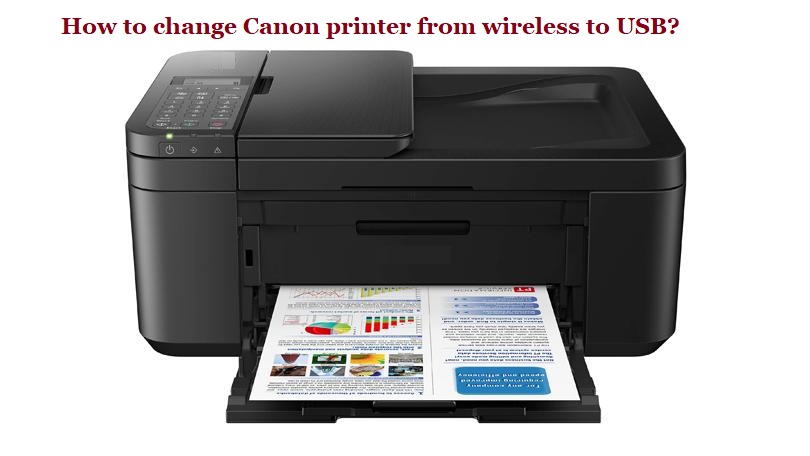
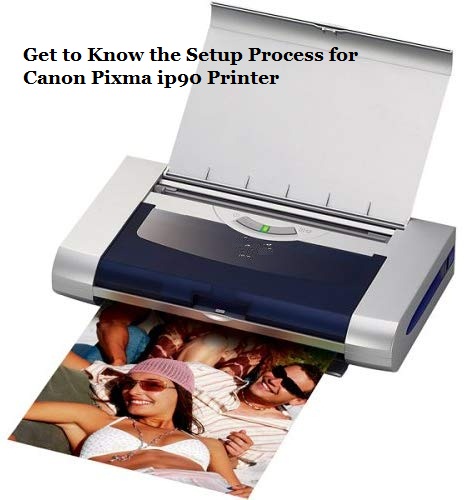
Canon Pixma TS8222 is an all-in-one inkjet printer. A user can simply print their personal and professional documents using the Canon Pixma TS8222. This printer shares an unbelievable printing experience with the customers.  This printing has manual duplex printing and comes with USB connectivity support. It is very easy to download the printer software and drives from Canon.com/ijsetup website and whole the printer setup process. In this post, we are going to share the simple guidelines that can help you with the printer setup procedure.

TS8222 Inkjet All-In-One printer setup

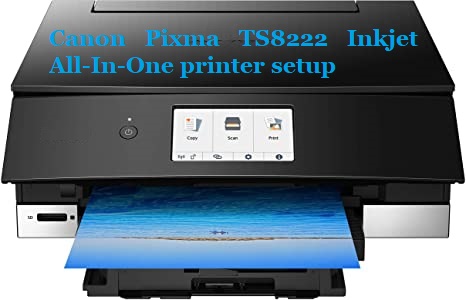
Canon Pixma TS8222 Wireless Setup Without CD: Guidelines To Follow

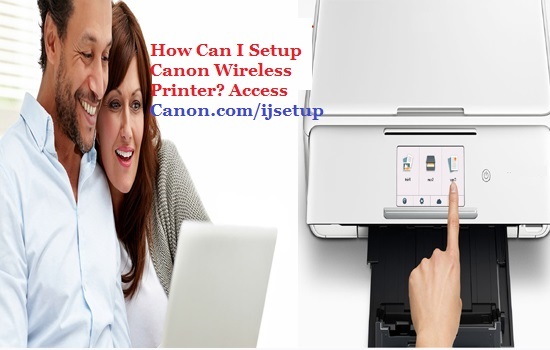
  • Keep your Modem and Printer ready. On your computer, open the web browser and visit the Canon.com/ijsetup for the printer setup.
  • Now, you have to install the printer package, hit the ‘Download’ button.
  • The file will be downloaded on your printer.
  • Open the downloaded files. Click ‘Continue’ button.
  • Accept the terms and conditions.
  • On the next page, verify if the printer’s name is seeming and hit the Continue button. If the printer is not showing, click on ‘my printer not showing’ option and follow the onscreen rules.
  • The installer will be looking for the available printer software.
  • In the connection method, choose ‘Wireless Network’ and hit the ‘Continue’ button.
  • For printer type, select ‘Inkjet and hit the ‘Continue’ button.
  • On the next page, select your printer without the touchscreen panel.
  • The prompt will ask you to attach the printer and computer with a USB wire briefly.
  • In the Wireless Setup page, you have to enter the ‘WiFi password’ and hit the Continue.
  • The WiFi Settings will be saved in your device. Next, see if your printer is showing the printer name and hit the ‘Continue’ button.
  • Once you are done with the setup, you require to remove the USB wire. Select the ‘Printer Software and Driver’ page. Select the whole the Software Driver package from the available option.
  • Hit the Continue button.
  • At last, the software will be extracted. You have to launch it on your computer.

These are the simple steps that can help you to whole the Canon Pixma TS8222 Inkjet All-In-One printer setup. The mentioned steps guidelines are very simple and easy to follow. But if you still have a doubt or if you are unable to complete the setup on your own, visit the www.canon.com/ijsetup and get the professional advice to get rid of the issue.

Source

How to change Canon printer from wireless to USB?

If you are using the Canon wireless printer that is straight linked to the computer with the help of USB wire then you can effortlessly convert it from a USB connection to wireless and vice-versa. Using a printer connected to a wireless printer network, then it can be simply used by the rest of the computers and that is connected to the network.

How to change printer from wireless to USB

You can effortlessly change the Canon printer from wireless to USB connection.  In this blog, you will learn how can you change the Canon Printer from the Wireless to USB and how to reconfigure the printer’s wireless settings if you have changed the wireless router. Previously you start with the topic you just essential to follow some of the things you need to have:

  • A working wireless network that works well within a wireless router.
  • SSID of the Wireless network you are using.
  • If you are using a password connected with the wireless network then you necessity a WEP key or WPA password.

How can you change the Canon printer from wireless to USB connection?

In this unit, you will get to learn the important steps to change the Canon printer from wireless to USB connection. Here are some of the significant steps:-

  1. First of all, you require to disconnect the printer from your computer system.
  2. Next, you need to open the “Control Panel” section from your desktop.
  3. Tap on the “Printers and Faxes” button.
  4. You now have to click on the “wireless all-in-one printer” and then tap on the “Delete” button.
  5. Now, just attach a USB wire to your printer and computer ports and then turn on your Printer.
  6. On your computer, you have to go to the “Start” followed by “All Programs” and then go to the final click on the “Canon Printer Network Setup Utility”.
  7. Select the USB model number of the printer you have and then tap on the “Next” button.
  8. Point to Remember: Once you have linked the USB to the printer and to the computer the printer driver will get installed.
  9. You will now see the “Printer driver Installation complete” message on the screen, you just have to snap on the “Done” button.
  10. In the last and final step, you will see that the USB-connected printer is now added to the “Printers and Faxes” unit and it will be accessible for printing from your computer system along with its programs.

Note: If you are stuck in between the steps that are just deliberated then you can visit the www.canon.com/ijsetup web page to get assistance.

In a conclusive viewpoint:

We hope that the blog has helped you to change the Canon printer from wireless to USB. However, if you are still stuck in between the steps or have any mis perception related to the topic we just discussed then we recommend you visit canon.com/ijsetup instructions and guidelines from the experts and professionals to help you.

Resolved Canon Printer is Not Printing

Nowadays, Canon printers are used in many places, such as homes, offices, organizations, and businesses for paperwork drives. It has developed an important tool for printing relevant documents and handling paperwork. Anywhere it is also a machine and gets in worry sometimes such as Canon Printer is Not Printing, Printer is working but not printing the black or color ink, or the printed page has shallow of ink. These issues can reason due to several reasons, from defective or wrongly configured printer drivers to incorrect connectivity issues.

Resolved Canon Printer is Not Printing

Try the following troubleshooting techniques to fix the Canon Printer Not Printing issue:

  • Rudimentary steps of troubleshooting
  • Updating the printer driver
  • Set the printer as default
  • Basic steps of troubleshooting
  • Verify the state of the well-known connections, network, or wire used to connect the printer and peripherals. All the connections should have to be standard.
  • Ensure that all the peripherals are properly connected to your Printer.
  • Turn off the peripherals and the printer and turn them back on after a though.
  • Make sure that the printer and the peripherals are reserved in the range of the router.

Updating the printer driver

In most of the cases, Canon Printer stops to print due to defective or wrongly configured printer drivers. So, ensure to update the printer drivers regularly.

You can install the updates of your Canon Printer Driver manually or mechanically.

Manually update the printer driver:

  • Visit the canon.com/ijsetup and then download the compatible version of the driver according to your Printer Model Number.
  • Find the downloaded file and double-click on it to install it into your computer system.
  • If encouraged, click on the Run button.
  • Follow the on-screen commands to complete the installation process successfully.

Set the Canon printer as default

Occasionally, it happens that you send a request to your printer to print something, but it doesn’t print since it is neither set as the default printer nor carefully chosen to print.

Follow these steps to set your printer as the default printer:

  • Press the Window + R button on the keyboard concurrently to open the Run dialog box.
  • Type Control in the search box, and then click on the OK button.
  • Choose the Devices and Printers option in the Control Panel window.
  • Right-click on your Printer in the Printers unit, and then click on the Set as default printer option.
  • If driven, click on the Yes button.
  • A tick will assign below the icon of your Printer. It results to mean that your printer is now set as the default printer.

Once the root cause of the trouble is known, you can easily fix the printer issue. You can also use www.canon.com/ijsetup to resolve the issue with Canon printers.

Source

Canon Pixma MX538 Printer Driver – Canon.com/ijsetup

If you are searching for the driver installation steps, then here are the steps to install the driver to the printer. To install the driver to the printer, you essential to top to the site.

mx538

Steps to start the network to the printer

  • Open the settings on the printer
  • Ensure you procedure the first-time setup to the printer
  • Next, you want to open the network option on the settings
  • Then your requirement to select the wireless settings option
  • Now allow the device to search for the network obtainable
  • Once you get the name of your network, you need to tap on the router name
  • Formerly enter the password to attach the network to the printer
  • Once this gets over, you will receive the notification to update the driver to the printer
  • Process the steps to install the driver to the printer

Steps to install the driver to the printer via the canon.com/ijsetup

  • After the network installation to the printer, you need to browse to the canon.com/ijsetup site
  • Open the site and then download and install the driver to the operating system
  • Now you require to store the driver to the operating system
  • Hereafter, you need to install the driver to the printer
  • Once the driver installation gets over you, require to confirm that there is an issue on the printer
  • Start to enjoy the printing experience with the canon printer.

For more information on the Canon Pixma MX 538, get in touch with our expert team and resolve the issues on the printer. Just visit www.canon.com/ijsetup.

Choose Canon pixma printer model & Get Setup using Canon.com/ijsetup

Canon Pixma Printer is one of the advanced printing machines, which is obtainable in different types of models such as Canon Pixma MG printer, MX printer, and TS printer etc. If you have bought any type of its printer model and want to set up at office or home, you require to access simply through canon.com/ijsetup. You can get the right driver installation method for your printing machine, commands to loading the load of paper, methods to fill up the ink into the container, and basic process that are wanted for Canon printer setup.

Choose Canon pixma printer model & Get Setup using Canon com ijsetup

Trouble-Free commands to setup Canon Pixma printer

To arrange Canon pixma printer working for printing, faxing, and scanning the document, setting up a Canon printer is required. So with the help of Canon.com/ijsetup, you can setup printer correctly. If you want to setup printer, you need to follow all the steps display in this link.

  • Primary of all, eliminate all the elements from the box just by taking out the tape softly
  • Secondly, you require connecting the printer’s power cord into the port and making sure the power switch is on.
  • After that, you have to connect USB cord from the printing machine to the computer system for setting up a link between two gadgets.
  • In the case of a wireless printer, with the aid of WPS, you can link the gadgets together over a wireless connection.
  • After that, go to the printer setting button on your computer system
  • In the case of a windows computer method, you will get this option in the “control panel” button. In the case of a Mac OS, you will get it in the “system preferences” button
  • Next, look for the button “Add a printer” button and after that follow the steps that display
  • Next, this is the time to effort printing something to test your printing machine
  • For printing the document, you require to open file to print and choose “file” button and knock on “print” option. Just click on “Ctrl+P” option on the displayed keyboard.   Then, make the right adjustment of the settings as your size of paper.
  • Lastly, a dialog box will display, identify and choose Canon printer from the list and hit on “print” button. Now, your printer setup process is completed through Canon.com/ijsetup. Still, if you have any issues, you can call online printer experts.

With the assist of all these instructions, you can setup Canon printer of the chosen model number using www.canon.com/ijsetup successfully.

Source

How Can I Setup Canon Wireless Printer? Access Canon.com/ijsetup

Setting up a Canon Wireless printer at your home and office is not as much difficult as you are thinking. When you read the blog-post, you can effort-freely set up your printer in just a second.

Have you newly bought a Canon Pixma wireless printer? If yes, then you first requirement to set up your printer properly at your office premises as only then you will be appropriate to take a printout or scan or fax the document. For non-tech or newbie, it would be quite tough to first-time setup printer, that’s why we deliver the link which anyone can take correct guidance to whole the setup process in a more effective way. Moreover, you can read the blog as this document is for the users who are looking for a printer setup guide.

How Can I Setup Canon Wireless Printer Access canonijsetupcom

Steps To Setup Canon Wireless Printer

After implementation these above guides, now you are allowed to set up your Canon Pixma wireless printer. Follow the step wise directions mentioned underneath for Canon.com/ijsetup:

  • Primary, make sure your printer is turned on
  • Next, you can use the touchscreen in the wireless printer to attach your wireless network
  • On the touchscreen, press the right arrow key and tap on “Setup” option
  • Choose “Network” from the setup menu
  • Select Wireless Setup Wizard from the Network menu, it will search for the wireless routers in the range
  • Choose your Network (SSID) from the given list
  • Enter the WEP/WPA Passphrase for the network and then click “Done”
  • Press OK to confirm the settings
  • Press OK to print the wireless statement or Skip if you don’t want

Don’t get panic! If you are facing problem in setting up your Canon Pixma Wireless Printer with the above-written instructions as there are well-trained technicians for your better assistance. You only need to visit  www.canon.com/ijsetup for printer setup.

Source

Get to Know the Setup Process for Canon Pixma ip90 Printer

Amongst the other versions, Canon Pixma ip90 is an amazing printer both in terms of features and cost. Enabled with extra-ordinary features, it has dynamic security. It comes with a wireless H printing feature and Photo Print. To know more about this series, read the article:

Get to Know the Setup Process for Canon Pixma ip90 Printer

Specifications of Canon Pixma ip90

Below given are some separate eye-catchy features of Canon Pixma ip90:

  • It has a feature to print and scan from smart phones also
  • An additional high-capacity tray that lets your printer work for a longer period avoiding recurrent reload of papers
  • Power Source AC 100-240 V, 50/60 Hz
  • Ink Compatibility BCI-15 Black ink tank, BCI-16 Color ink tank
  • Standard Interfaces USB and Direct Print Port (cables not included); IrDA and Bluetooth***(optional)

Minimum System Requirements  

The Canon Pixma ip90 does not require any high requirements. Here are a few provisions:

  • Can with no trouble function on both Windows 10 and Windows 8
  • High-speed internet connectivity for smooth functioning
  • It also performs or let’s say compatible with OS.

Additional Features

Take note of extra features and functions given below:

  • Power Source AC 100-240 V, 50/60 Hz
  • Print Speed (up to) Black:16 ppm (approx. 3.8 seconds/page)*Color:12 ppm (approx. 5 seconds/page)*4×6 Color Photo:approx. 51 seconds/page* (Borderless

How to setup Canon Pixma ip90?

If half of the people use Windows then another half would be using Mac.  Thus, know the procedure according to your choice:

For Windows

  • Put in the installation CD to launch software installation
  • If the program does not start within 30seconds, then try to browse the CD drive on the computer
  • Run the SETUP file
  • Now, select the software from Software options flashed on the screen
  • Note: Recommended software installation includes printer driver and software for all print features
  • Knock, ‘Customizable software link’ to customize installed software
  • Once the procedure is complete, click Next
  • Follow the on-screen commands to install the software

For OS X

  • Downloaded software must be launched
  • Push Install button or Customize tab for custom installation
  • Select the components that require to be installed on your screen
  • Now, follow the commands given on-screen to install the software

Downloading and installing of software

  • Download the newest printer software version
  • Download driver visit Canon.com/ijsetup & Enter Model Number
  • In still the issue exists, apply troubleshooting steps

Troubleshooting Issues in Canon Pixma ip90

Frequent Issues in the printer are:

  • Printer not in service in proper form
  • There may come problem with the driver
  • The display panel may come across error code
  • Cartridge ink may not be carried in a right way

However, for every problem, there comes a solution. In case you need assistance, try to visit www.canon.com/ijsetup with the technical experts who will assist you fix your problem immediately. They are available all round the clock, 24*7.

Source

Canon PIXMA GM4050 Printer Setup and Driver downloads –Canon.com/ijsetup

Canon PIXMA GM4050 printer means business as it is best suited for office use. High-performance 3-in-1 monochrome ink tank printer with low cost per page. You can easily print from USB devices using this Printer.

Canon PIXMA GM4050 Printer Setup and Driver downloads

WIRELESS SETUP

You can connect this printer to your PC easily

  • Begin your wireless  process by approaching the ‘Setup’ button on your printer to open the menu
  • The following step is to go through the menu using the left and right arrow buttons.
  • After that, choose Network -> Wireless Setup Wizard and select your SSID network from the list
  • Lastly, enter your unique WEP network key and connect your Canon PIXMA GM4050 printer to the network
  • You can connect your Canon PIXMA GM4050 printer without any driver software to your computer. Now enter ‘Devices and Printers’ on the search bar and open the option
  • After that, click ‘Add a printer’ -> ‘Add a network, wireless or Bluetooth printer’ and now wait for a few moments for your Canon PIXMA GM4050 printer to show up
  • Finally, choose the printer and install it by clicking ‘next’

DRIVERS DOWNLOAD

Printer driver and software helps you to to access your Canon PIXMA GM4050 printer and make the best use of it

For the Download the printer drivers from Canon.com/ijsetup & follow the steps to get your printer into working.

For further queries regarding Canon PIXMA GM4050 printer setup and driver downloads, feel free to visit www.canon.com/ijsetup.

Source

How to Connect a Wireless Canon Printer? | Canon Pixma Wireless Setup

Canon Pixma Printer is coming up with wide features that allow the users to get an easy and instant borderless printing. No more hindrances in getting direct printing with wired connections. You can with no trouble print your documents by accessing your Smartphone, tablets and computers.. Go through the below information to learn more about the Canon Pixma Wireless Setup process.

Paper loading

  1. It is a must thing to load the stack of paper for the printer, before happening to the wireless setup printing
  2. Open the paper tray in the printer and slide the width guides
  3. Put in a stack of paper in the obtainable space of the paper tray
  4. Make sure your printing side of the paper should be facing downwards and close the paper tray

Printer software installation

To avail the wireless printing option, you should first install the individual software on your computer or mobile device. In case, you are accessing the computer for printing, go to the Canon.com/ijsetup site and Enter model number for Canon printer setup.

Canon PixmaWireless Setup

In the software

  1. Enter the installed software on your computer and do the initial Canon Pixma Wireless Setup process
  2. By clicking the print button, you can see the available printers around your system
  3. Choose your printer name and click the properties dialog box/printer setup/properties button
  4. Enter the properties and choose the page orientation, layout, paper size factors etc

In the control panel options

  1. Furthermore, you can access the printer using the control panel options
  2. Clack the start button and go to the ‘control panel’
  3. Choose the ‘devices and printers’ option below the control panel to view the available printers
  4. Click your printer name in the list and follow the on-screen guidelines to install the necessary drivers

In this way, you can easily retrieve the information on the wireless connection made. Which is totally a free service in which the user can allow their prints from any time and location? Visit www.canon.com/ijsetup for any kind Canon pixma printer setup.

Source

Canon Pixma MG6930 Setup | Canon.com/ijsetup

Any printer model that you use, wireless setup is forever good and explains Canon Pixma MG6930 Setup steps.

Canon Pixma MG6930 Setup

How to Start Canon Pixma MG6930 Setup
The first point to keep in mind- Without the preliminary requirements such as wireless network credentials & cables to attach, proceeding with the wireless setup is challenging.

  • Connect the hard wares- Slide the power wire to power up the machine.
  • Slide the Ethernet wire- Ethernet cable may be required as you carry on & you can connect it whenever you receive a prompt.

Begin the Canon Pixma MG6930 Setup

  • Navigate to control panel settings and start your search to find the wireless setup wizard.
  • Then make the choice & as you continue, you will receive a prompt to answer all the instructions of the wizard.
  • If auto wireless attach feature is available, use it to connect the device mechanically to the network.
  • Once if the network connection is active, you can progress with the software downloads & there are multiple methods- software download from www.canon.com/ijsetup & using the cd provided with the package.

Troubleshooting to get rid of wireless setup errors

  • Errors are common & you can make use of the tip below.
  • Install the scan tool well-matched to run an instant scan of your device.
  • To start with Cross-check & confirm the wireless network credentials(username & password).
  • Use an exchange network connection if the existing one doesn’t work.
  • It’s good to carry out manual reset -disconnect the device from network & connect it back after a while.

Talk to our techies to know more about Canon Pixma MG6930 Setup windows, troubleshooting & much more information just visit our site Canon.com/ijsetup.

Source